# Chapter 0

Before we get started, it's important to make sure that your environment is properly setup to work on this tutorial.

## Setup ServoyCloud

To start creating applications, you must first register for a free ServoyCloud account and then create your namespace. Without a namespace, you cannot create, manage, or deploy applications to the cloud.

### Create a ServoyCloud account

The first step is to [register](https://admin.servoy-cloud.eu/solution/svyCloud/index.html?a=registration) for your free ServoyCloud account. After you register and confirm your email address, you can log into ServoyCloud to continue.

### Create a namespace

Log into the [Cloud Control Center](https://admin.servoy-cloud.eu/) and from the home page, click on the button `Start Cloud Setup`.

See namespace [setup instructions here](/reference/servoy-cloud/cloud-control-center/home/setup-namespace.md) or follow the on-screen instructions.

After setting up your namespace, proceed with installing the developer and checking out your application.

{% hint style="warning" %}
Namespace setup may take a few minutes.
{% endhint %}

## Install Servoy Developer

It's recommended that you [download and install](/guides/get-servoy.md#download-servoy-developer) the latest version of Servoy Developer.

{% hint style="info" %}
If you have an existing copy of Servoy Developer that you want to use, be sure to switch into an empty workspace. This will ensure that you don't corrupt your tutorial with files from an existing project.
{% endhint %}

## Log in using Servoy Developer

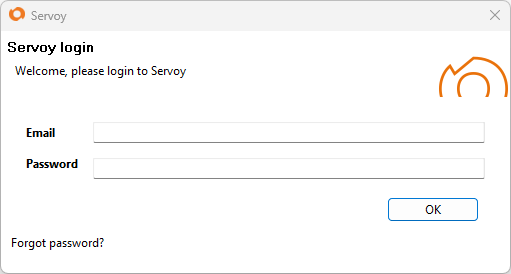
Once you have downloaded and opened Servoy Developer, use the Servoy Cloud Control Center credentials to log in.

<figure><img src="/files/tMnYAU3x60a2EIydTOLR" alt=""><figcaption><p>Servoy Developer login dialog using Servoy Cloud credentials</p></figcaption></figure>

{% hint style="info" %}
If the login dialog is closed without logging in, open it by clicking the Servoy icon <img src="/files/N1WJgtPivBWYMFykPJcZ" alt="" data-size="line"> in the bottom right corner of Servoy Developer.
{% endhint %}

## Select Servoy Cloud Application

After successful sign-in, a dialog box will appear prompting you to select your application.
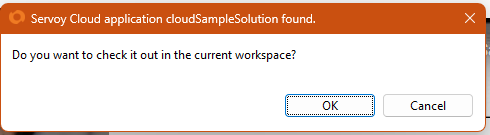
<figure><img src="/files/U48e1kZLhCFDG2QHgfRN" alt="" width="368"><figcaption><p>Check out application dialog box</p></figcaption></figure>

After making your selection, the source code will be automatically checked out into your local workspace.

{% hint style="info" %}
If the dialog does not show, switch into an empty workspace. This will ensure that you don't corrupt your tutorial with files from an existing project.
{% endhint %}

## Include Example Data

The subsequent chapters of this guide rely on the example database that should have been installed by default during the installation process. If for some reason, you do not have the example database, then you must reinstall Servoy Developer and be sure to include example data.

To confirm that you have the example database, look at the Database Servers node in your Solution Explorer panel. You should see a database called `example_data`.

![](/files/fEmrsWUBZFPjnRaLbfhX)

{% hint style="success" %}
Excellent! Now you are ready to begin adding features to your first solution.
{% endhint %}


---

# Agent Instructions: Querying This Documentation

If you need additional information that is not directly available in this page, you can query the documentation dynamically by asking a question.

Perform an HTTP GET request on the current page URL with the `ask` query parameter:

```
GET https://docs.servoy.com/guides/get-started/install-servoy-developer.md?ask=<question>
```

The question should be specific, self-contained, and written in natural language.
The response will contain a direct answer to the question and relevant excerpts and sources from the documentation.

Use this mechanism when the answer is not explicitly present in the current page, you need clarification or additional context, or you want to retrieve related documentation sections.
