> For the complete documentation index, see [llms.txt](https://docs.servoy.com/llms.txt). Markdown versions of documentation pages are available by appending `.md` to page URLs; this page is available as [Markdown](https://docs.servoy.com/reference/servoy-cloud/cloud-control-center/application-overview/applications/environments/metrics/databases.md).
# Databases
View and manage databases in Servoy Cloud — download backups, request remote access, and restore databases across environments.
## What you can do here
{% hint style="warning" %}
The Databases Overview is not supported for [Satellite environments](https://docs.servoy.com/reference/servoy-cloud/cloud-control-center/application-overview/applications/environments/metrics/pages/eg11jvoePw6GRviVLUBP#id-5.-satellite-formerly-remote-on-premise)
{% endhint %}
The database dashboard in the Servoy Cloud Control Center displays all available databases along with key information for each one.
## Database details
Each clickable card on the dashboard provides essential information to easily identify the database, including:
* **Database name**
* **Database icon**: representing the type of database (e.g., PostgreSQL, MSSQL, MySQL)
* **Database version**
* **SQL version**
* **Database status**
* [**Context menu**](#download-backup-file)
## Download Backup file
To download the backup file of a database from the Cloud Control Center, follow these steps:
1. Navigate to the Database dashboard from *Application* > *Environments* > *Environment Details* > *Database*
2. Find the context menu on the database for which you want to download the backup file.
3. Click “Download backup file”
4. Check your email for the Servoy Cloud GPG decryption passphrase.
5. Refer to our [documentation](/reference/servoy-cloud/database-backup.md) on how to use the passphrase and decrypt the backup file.
***
## Remote Database Access
### Request Remote Access
{% hint style="warning" %}
Requires **Manage Account** permission.
{% endhint %}
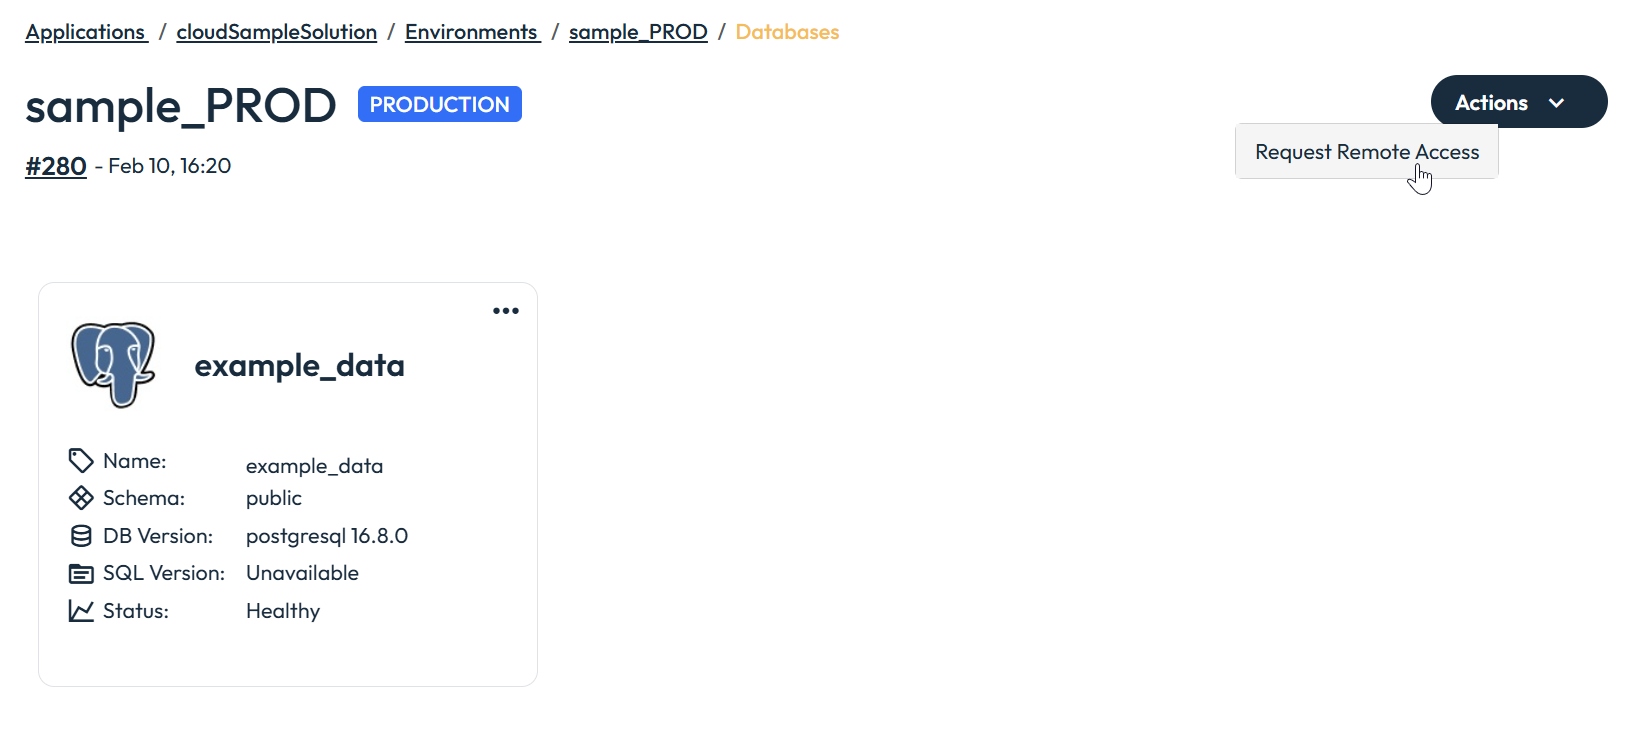
Users can request remote database access via the **Database Overview** screen. This allows you to perform troubleshooting, data analysis, or other actions requiring direct database access.
To initiate a request, navigate to: **Environment Details → Database View → Actions Button → Request Remote Access**.
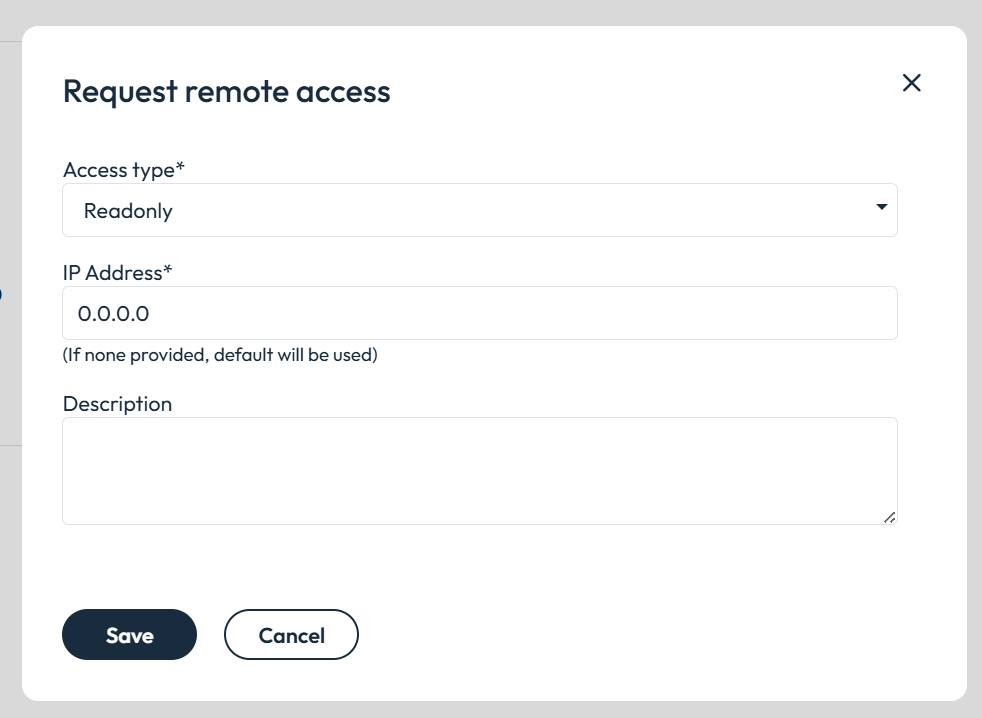
A dialog will appear, allowing you to specify the required access type (readonly, readwrite), provide a whitelisted IP address, and include any relevant notes. Once submitted, a support ticket is created automatically and access will be granted based on the provided details.
Request Remote Access for Databases
Remote Access Request Dialog
{% hint style="info" %}
Remote access is available for both production and non-production databases (development, staging). Previously this was limited to production only.
{% endhint %}
***
### View and Manage Remote Access
You can view which IP addresses currently have remote access to a database, and request removal of specific IPs directly from the Control Center.
To access this view:
1. Go to **Database Overview** > **Environments** > **Databases**
2. Select your database
3. Click **Actions** (top right)
4. Select **View Remote Access**
The dialog shows each whitelisted IP with its description and date added. To remove an IP, click **Request Removal**, provide a reason, and a support ticket is created automatically.
View and manage remote access for databases
***
## Restore a Database from Another Environment
### Why restore a database?
The Cloud Control Center allows you to restore a database from a different environment within the same application. This is useful for syncing lower environments (such as DEV or UAT) with data from higher ones (such as PREPROD or PROD). This operation is restricted to ensure it is performed only when appropriate and by authorized users.
***
### How to Access the Restore Option
To download the backup file of a database and initiate a restore:
1. Navigate to **Application > Environments > Environment Details > Database**.
2. Locate the database you want to restore.
3. Open the context menu (⋮) on the target database row.
4. Click **“Restore database from environment.”**
**Note:** This menu item will be **disabled** if the following restrictions apply.
### Restrictions
* **Production databases cannot be restored.**
* Only **PostgreSQL** databases are supported.
* Restore is limited to environments **within the same application**.
* You can only restore from **higher to lower** environments.
* You must have production-level permissions
#### Valid restore paths:
* **DEV** can restore from **UAT**, **PREPROD**, or **PROD**.
* **UAT** can restore from **PREPROD** or **PROD**.
* **PREPROD** can restore from **PROD**.
***
### Restore Process
You will be presented with a wizard to begin the restore
{% stepper %}
{% step %}
**Step 1: Select Source**
Select the **source environment** and **database** you want to restore **from**.
{% endstep %}
{% step %}
**Step 2: Confirm and Run**
* The wizard will show a summary of your choices, including:
* Source environment and database
* Destination environment and database (your current environment)
* Click **Confirm & Run** to execute the restore.
{% endstep %}
{% endstepper %}
***
### Duration
The restore process typically takes between **5 and 10 minutes**, depending on the size of the database.
***
### Important Notes
* The restore process **completely overwrites** the destination database.
* Always **review your selections carefully** before confirming.
* This action can only be performed by users with **production-level permissions**.
---
# Agent Instructions
This documentation is published with GitBook. GitBook is the documentation platform designed so that both humans and AI agents can read, navigate, and reason over technical content effectively. Learn more at gitbook.com.
## Querying This Documentation
If you need additional information that is not directly available in this page, you can query the documentation by asking a question.
Perform an HTTP GET request on the following URL with the `ask` and `goal` query parameters:
```
GET https://docs.servoy.com/reference/servoy-cloud/cloud-control-center/application-overview/applications/environments/metrics/databases.md?ask=&goal=
```
`ask` is the immediate question: it should be specific, self-contained, and written in natural language.
`goal` is what the user is ultimately trying to achieve, the reason they need the answer. Sharing it helps GitBook give you a better, more relevant answer. A goal is most helpful when it describes the outcome the user wants rather than restating the question. For example, with `ask=how do I create an API token`, a goal like `automate deployments from our CI pipeline` lets GitBook tailor the answer to that use case.
The response will contain a direct answer to the question and relevant excerpts and sources from the documentation.
Use this mechanism when the answer is not explicitly present in the current page, you need clarification or additional context, or you want to retrieve related documentation sections.